
That's right, I'm starting a pie of the month gig and I'm sneaking in this recipe for January just before the month ends. We've been serving these little babies at the restaurant since October and they've been hugely popular. I think what really makes the difference is that we fill the prebaked pie shells with the coconut custard to order and bake the meringue to order so the crust stays nice and crisp and the meringue doesn't "weep" all over the pie after sitting for a while. One thing to note here is that although I love meringue, I prefer this pie with a whipped cream topping so I'm going to provide that in the recipe. I'll also give you my meringue as well so you can choose - or you can save it to use as a topping on a different pie.
Coconut Cream Pie
Recipe fills a 9 inch prebaked pie crust - make sure it is cooked through on the bottom. To do this line pie crust with foil and pie weights (I use dried beans) and bake at 400 degrees for 20 minutes. Remove pie crust from oven and let it cool long enough for you to safely remove the foil and pie weights; maybe 10 minutes. return to the oven and bake for an additional 8 minutes or so until the crust bottom is golden brown. For a good pie crust recipe search through my quiche post.
1/2 cup sugar4 TBS cornstarch
Combine the sugar, cornstarch , and salt in a medium size mixing bowl. Whisk in the scalded milk. Set over a pot of simmering water (bain marie) and whisk until the mixture is slightly thickened. While whisking, gradually add the egg yolks into the hot milk mixture (this is called tempering in the eggs, so that you don't scramble them in the process). Place the bowl over a bain marie and cook until it is thick and custard like - stirring frequently so as not to curdle it. When the custard coats your spoon it is ready and you can carefully remove the bowl from the heat and add the vanilla and butter. Whisk to melt butter and add the coconut. Chill thoroughly before filling your cooled pie shell.1/2 tsp salt2 1/2 cups whole milk, scalded4 egg yolks2 tsp vanilla extract1 1/2 cups unsweetened shredded
coconut2 TBS unsalted butter
Whipped Cream Topping:1 1/2 cups cold heavy cream2 TBS sugar1/2 tsp vanilla extracttoasted unsweetened shredded coconut
Combine cream, sugar, and vanilla and whip until you have a medium stiff peak - at some later date I'll try to include some photos of the difference between soft, medium, and stiff peaks for both whipped cream and meringue. For this pie - if you are making one whole pie and not individual ones, you will need your cream to be stiff enough to slice through without oozing everywhere, yet be careful not to over whip it and start making butter.
So now fill your pie, top it with whipped cream, and sprinkle with the toasted coconut. You should chill the entire pie to set it for at least 45 minutes so you can get a fairly clean slice. Or do what I do and buy some individual pie pans so you don't have to worry about that - just plop a pie on a plate and you're done!
And before I forget . . . the Meringue recipe . . . this is for French Meringue. There are three distinctly different methods: French, Italian, and Swiss and if you'd like to study up on the differences there's a pretty good summation at http://www.baking911.com/howto/meringues.htm.
Meringue4 egg whites1 1/2 cups powdered sugar
Place egg whites in a very clean, dry mixing bowl and whisk on low until it gets frothy and opaque. Now increase the speed to medium and beat until you get smooth medium peaks then start gradually adding the powdered sugar a tablespoon at a time. Then beat on high until you achieve stiff peaks, ie. when you remove the whisk from the meringue it stands up on end maybe only drooping over a little bit. Once again be careful not to over beat - if it looks dry and separated you've taken it to far and, well, you need to start again.
Just a word - this mixture will be whisking for a while so once you add all the sugar go start washing the dishes or something and check it periodically. And also, I use a Kitchen Aid for just about all whisking and mixing that I do so if you're functioning without, I hope you've got some strong biceps and triceps cause you'll be working them.
If you're doing individual pies you can try my method of piping or spooning out little mounds of meringue on oiled parchment paper and putting them in the freezer until you are ready to serve. Then put them on a sheet pan, still on the paper of course, and bake them at 400 degrees until they are golden brown. After about 30 seconds of cooling, they should peel right off the paper into your hand and you can invert it onto the pie.
If you've made a nine inch pie, top the custard with he meringue, making pretty swirls and such with your spatula or knife, and then place the entire pie in the oven to brown the meringue. You'll need to cool it again once you've done this if you care about getting a good slice.
In the photo above the pie is served with a Passionfruit Caramel Sauce and candied fresh coconut. In the fall we did it with a Hot Buttered Rum, which I prefer if I absolutely had to have sauce. But really I prefer this pie, maybe all pie, sans the sauce. Except for presentation, I don't think it needs it. If you are, however, interested in these recipes please send an email; I'm happy to share them and they are not difficult to prepare.

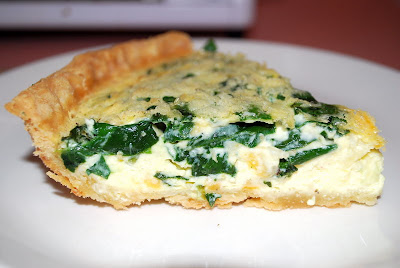
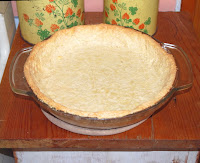 While the crust is baking and cooling, it's time to make the egg filling and the various and sundry items you'd like to add to your quiche. Custard Filling: